Toyota Maintenance – How to Change Cabin Air Filter
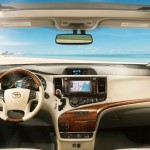
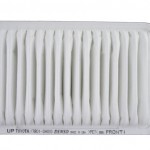
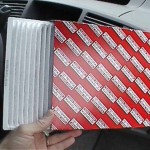
Most modern Toyota vehicles come equipped with a cabin air filter designed to keep the air inside your car clean and fresh. If you're not familiar with this feature or if it's been a while since your last replacement, there's a good chance it's time to swap it out. Here's a step-by-step guide on how to do it. Make sure you purchase the correct cabin air filter for your specific Toyota model before starting. Before diving into the replacement process, ensure you have the right cabin air filter for your vehicle. These filters come in various sizes and shapes, so getting the wrong one could mean it won't fit properly. Additionally, it might be wise to tidy up your glove compartment before beginning. Most newer Toyotas store their cabin air filters behind the glove box, and having fewer items in there can save you time during the replacement. The cabin air filter is usually located behind the glove box and is inserted vertically. Congratulations! You've successfully replaced your cabin air filter. Now, you'll enjoy improved air quality whenever you use the AC or heater. Changing your cabin air filter isn't just about improving air quality; it also helps maintain your vehicle's performance and ensures that the air conditioning system runs efficiently. Regular maintenance tasks like this can extend the life of your car and provide peace of mind. If you're unsure about any step or encounter difficulties, don't hesitate to consult your vehicle's manual or seek professional assistance. Low Temperature Battery Additive,Lithium Bis(fluorosulfonyl)imide,Lithium Trifluoromethanesulfonate,Lithium Salt Additives Suzhou Cheerchem Advanced Material Co., Ltd. , https://www.szcheerchem.com

Steps to Replace Your Cabin Air Filter
Related Articles
 Toyota Sienna Maintenance – Replacing the Cabin Air Filter
 Toyota Air Filter Replacement – 17801-0H010
 Toyota FJ Cruiser Maintenance – Changing Air Filters
 Toyota Cabin Air Filter Replacement – 87139-YZZ08
 7 Car Parts That You’ll Need To Replace Soon
 Toyota Maintenance – How to Clean Battery Cables/Terminals