Measuring DX Evaporator Coils For Fit: In the field with Chris Wright
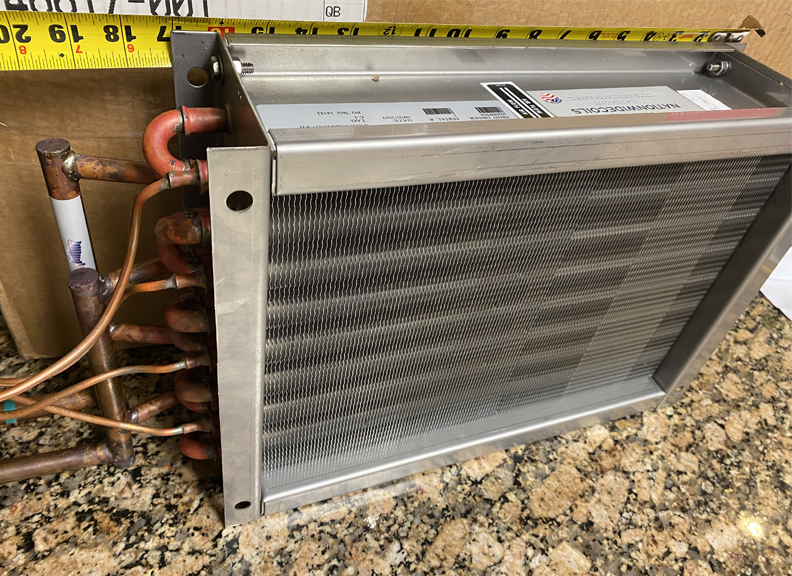
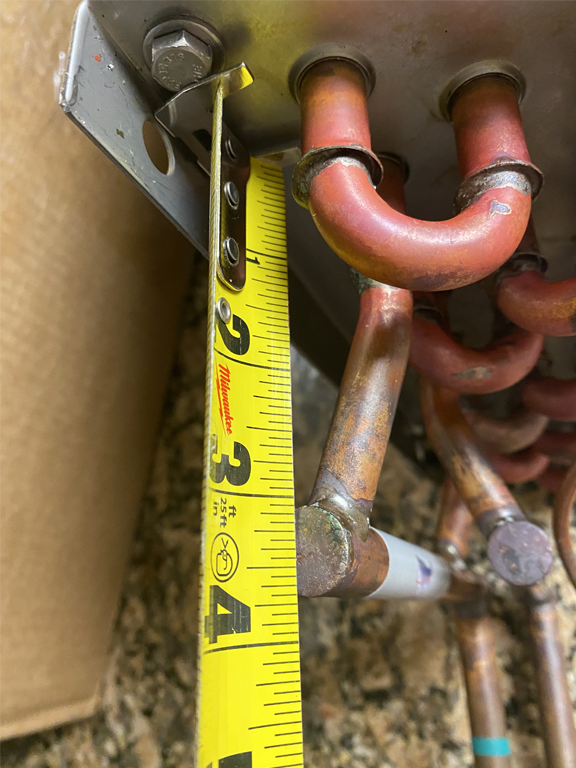
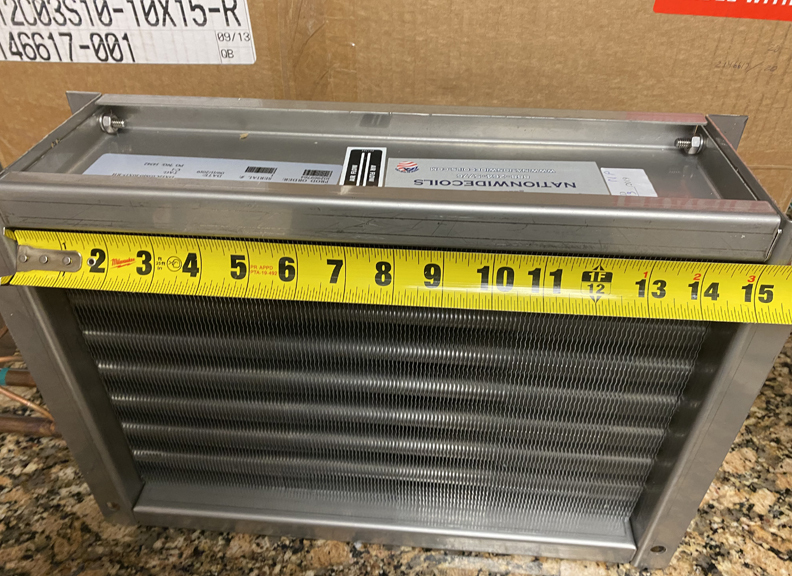
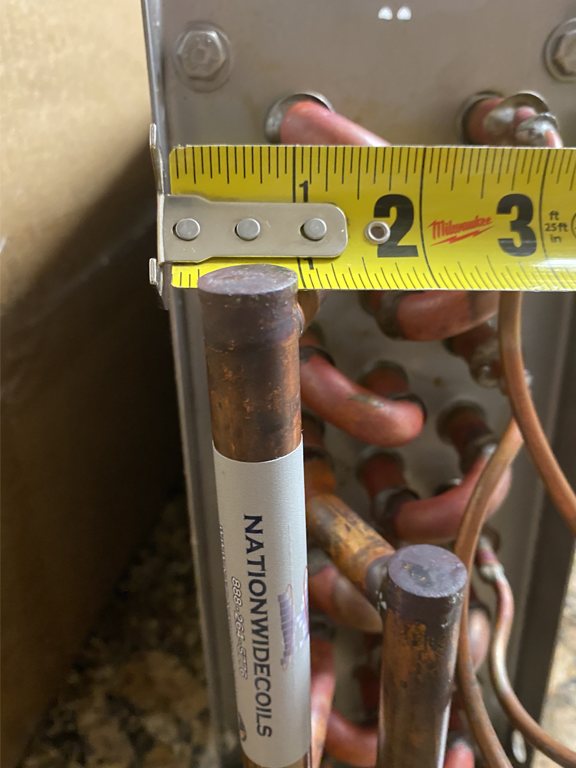
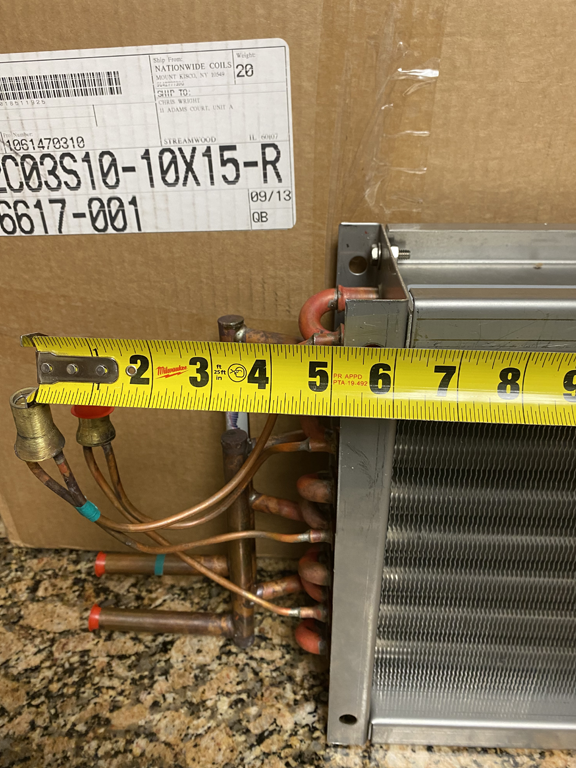
A detailed, step-by-step guide to measuring DX evaporator coils accurately, complete with visual tips and real-world advice to ensure a seamless installation. In a recent post, we covered how to accurately measure a DX evaporator coil for pricing purposes. Now, let's take it one step further. Once you've secured the job and have the replacement coil in hand, the next challenge is making sure it fits perfectly—no shortcuts, no guesswork. This is where precise measurements of the casing depth, headers, distributor locations, and return connections become essential. These details can mean the difference between a smooth installation and a costly delay. The casing depth is one of the most critical measurements. It refers to the distance from the outside of the casing on the air-in side to the outside on the air-out side. This is important because the casing often uses the full depth of the unit, and there’s little room for error. I always double-check this measurement from both the top and the end of the coil. I also like to measure the total available depth inside the coil housing just to be safe. This helps if the customer later wants to adjust the system’s capacity or change the number of rows used. The casing height is another key dimension. I check it in two ways: by measuring from the top edge of the top flange to the bottom edge of the bottom flange, and by adding the height of each flange to the finned section. Be careful—some flanges are not standard (like inverted or knife-edged ones), so make sure to note the actual height if they’re non-standard. Next up is the casing length, which is measured from the edge of the vertical flange near the supply and return connections to the opposite flange that covers the copper U-bends. The overall length (OAL) is just as important. To get an accurate OAL, take three specific measurements: The sum of these three measurements gives you the overall length of the coil—including headers, but not including the return connection, which may stick out of the unit. I always verify the available space in the unit to make sure the OAL fits well and to see if there's extra room for adjustments. When it comes to circuiting, every detail matters. Be sure to record: Also, count the number of tubes from top to bottom in one row. This can help when verifying the finned height, especially if things don’t add up at first. While some coils may be re-piped during installation, it's best to keep the original return connection and distributor locations intact. Always document: On a dual-circuited coil, the center-to-center distance between connections can help confirm their placement. Also, measure the diameter of the sweat return connection. Once all construction details are verified, the coil’s performance and structure should match the required specifications. In some cases, fins per inch, number of feeds, or circuits might be adjusted to fine-tune capacity without changing the construction. At this point, it’s about choosing what works best for the customer’s needs. If this all sounds like a lot of work that should be handled by a pro, that’s exactly what it is! Let Nationwide Coils handle the tough measurements so you can focus on the job at hand.
We produce and export construction Machinery Parts for 24 year . We are professional manufacturer of Komatsu hydraulic parts,Komatsu main hydraulic Pump,komatsu hydraulic Pump ,excavator hydraulic spare Parts and bulldozer hydraulic spare Parts . Our construction machinery parts conform to international standards, reliable quality, reasonable price, and sexual high prices, the consensus of many foreign customers. We also provide technical support services to help you find the right part for your machinery. With our extensive experience in this field, we can offer you competitive prices on all kinds of Komatsu Parts which will surely meet your needs perfectly!
Hydraulic Parts,Hydraulic Pump,Gear Pump,Oem Komatsu Parts Jining BST Import and Export Co.,Ltd , https://www.komatsucatparts.comMeasuring DX Evaporator Coils for a Perfect Fit: A Field Guide with Chris Wright

Measuring casing depth
Measuring casing length


Written by: Chris Wright
Nationwide Coils Account Manager, Chicago
China Komatsu Hydraulic Parts Suppliers